To Connect a LabVIEW device to AWS IoT cloud using WireQueue MQTT Toolkit

Welcome to my world of Internet of Things and Cloud Computing. I received my bachelor's degree in the discipline of Internet of Things. I also write technical articles. I am now pursuing a Masters degree in Cloud Computing. I am an Amazon Web Services Certified Cloud Practitioner.
🔗Requirements
- 📌LabVIEW 2019
- 📌AWS account
- 📌WireQueue MQTT Toolkit
You can check my article LABVIEW BASICS in case you are new to this topic.
WireQueue MQTT Toolkit - This Driver is a LabVIEW software add-on. This add-on allows you to communicate securely over the Internet utilizing the WireQueue.com service.
Make sure you must have your AWS account. You can create a free account for 12 months. For more details, I must recommend Amazon Web Services- An Overview (article by Neha Soni)
Let's dive into the step-by-step implementation🍁 !!
🔗Registering Thing
Install toolkit for LabView WireQueue-MQTT by WireFlow.
Now login to your AWS account.
AWS offers a plethora of services. Look for
IoT coreservice.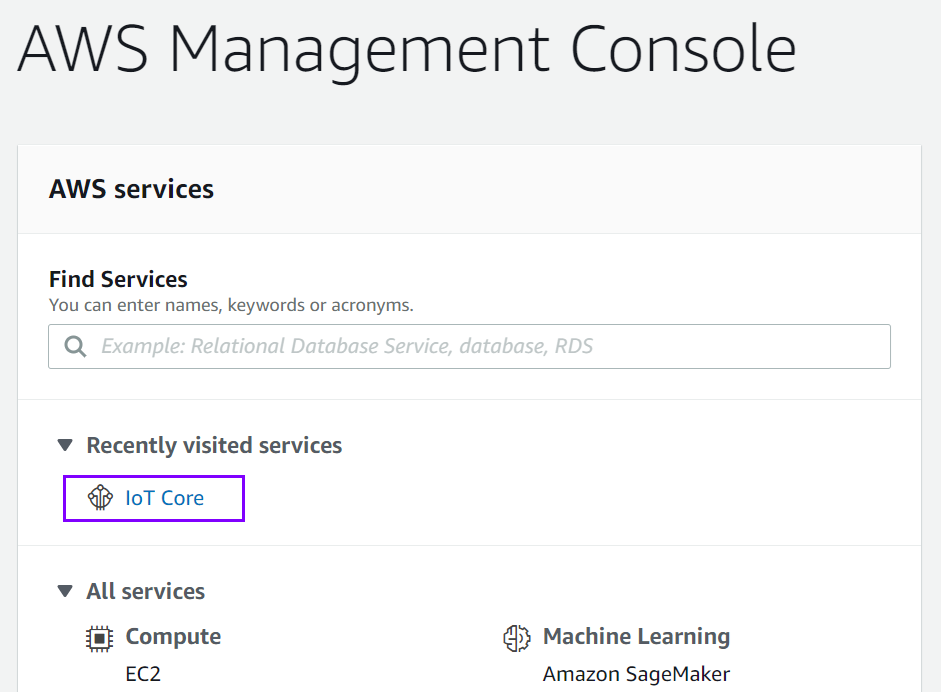
We will now build a "Thing."
Go to
Manage->Things, and choose "Register a thing" or Create if you have already registered Things.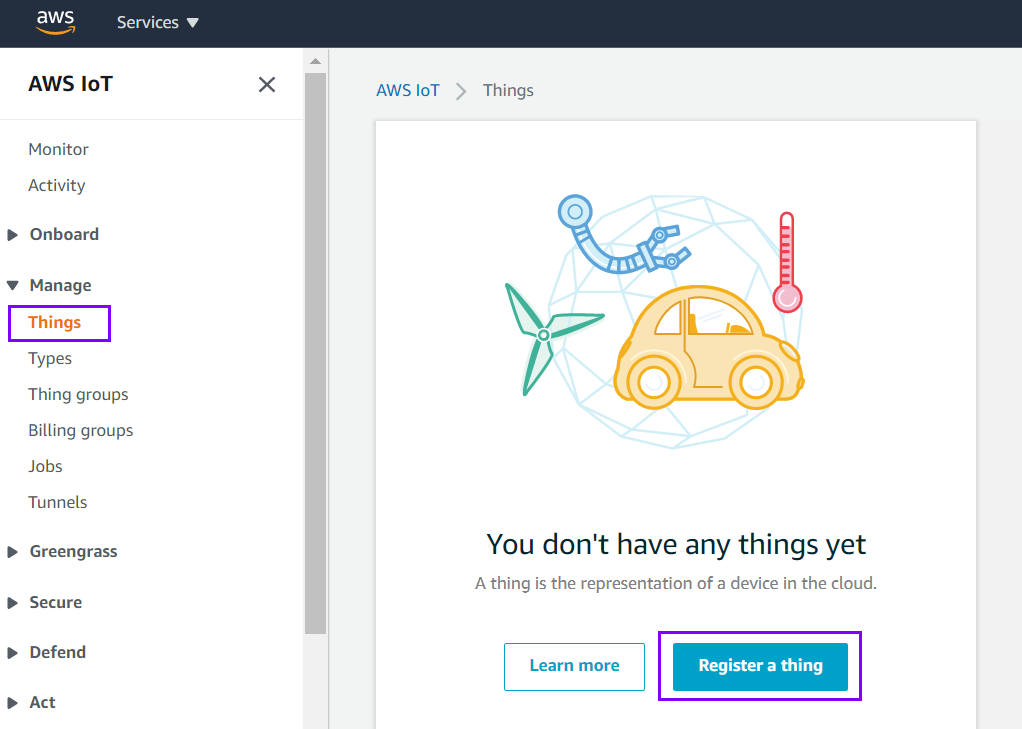
Click Create a single thing.
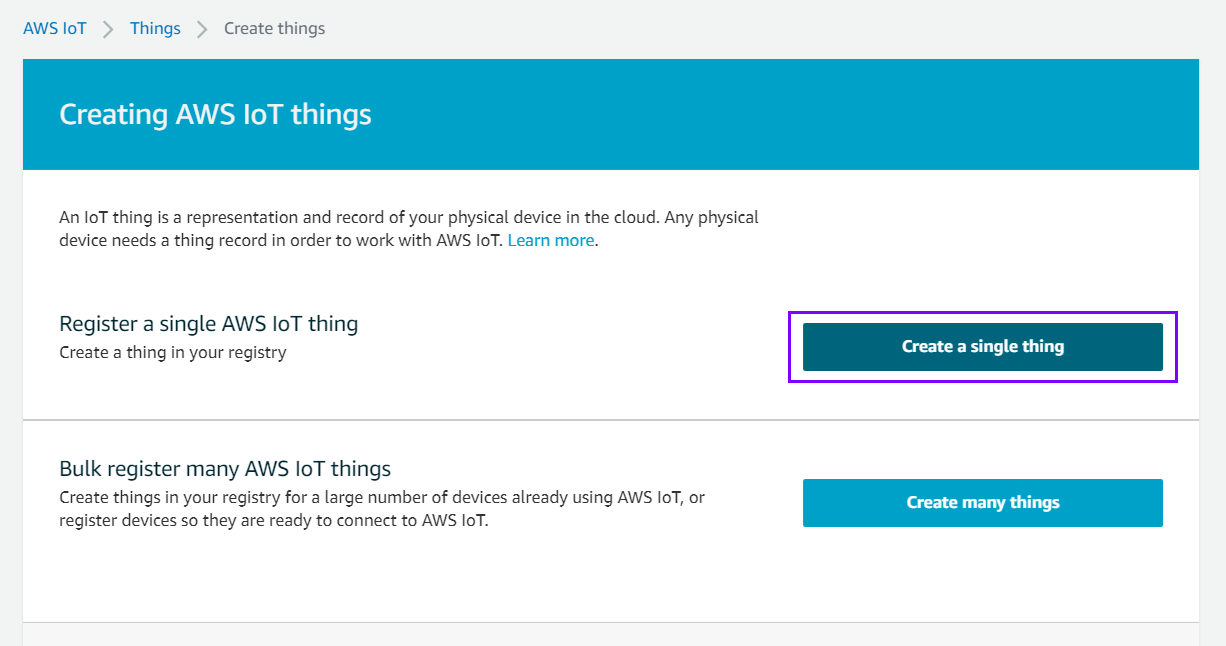
Now we need to give the thing a name (e.g. “Pavan21”) and click Next.
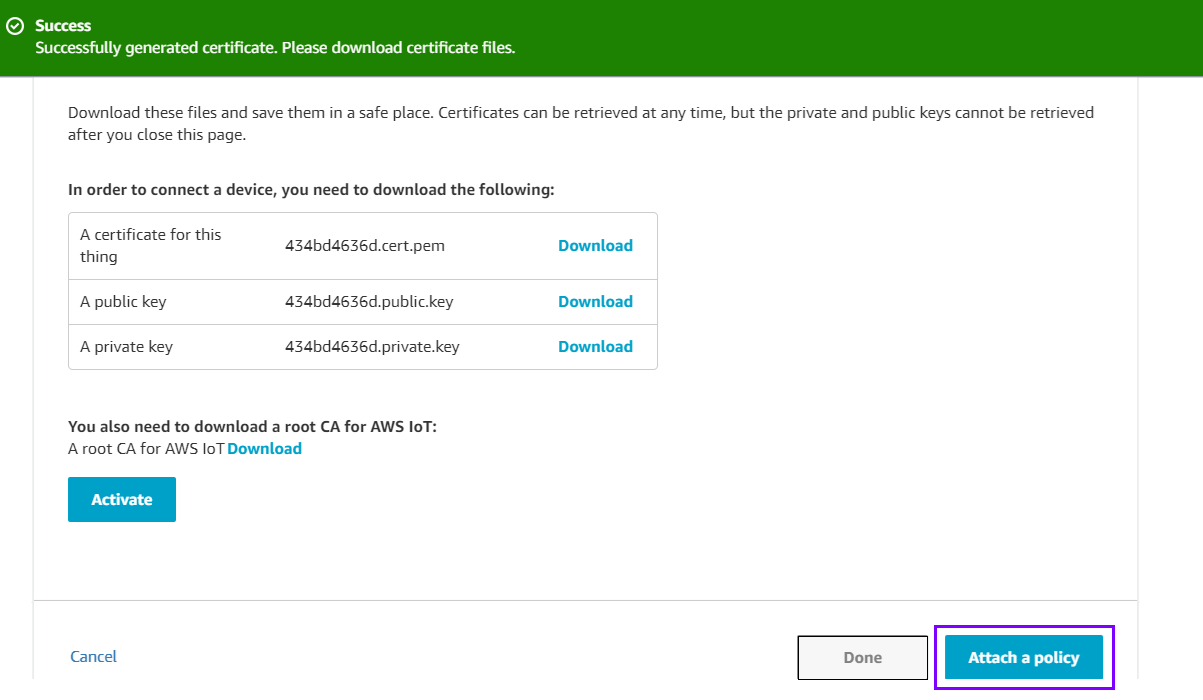
Create a certificate and keys using One-click certificate creation.
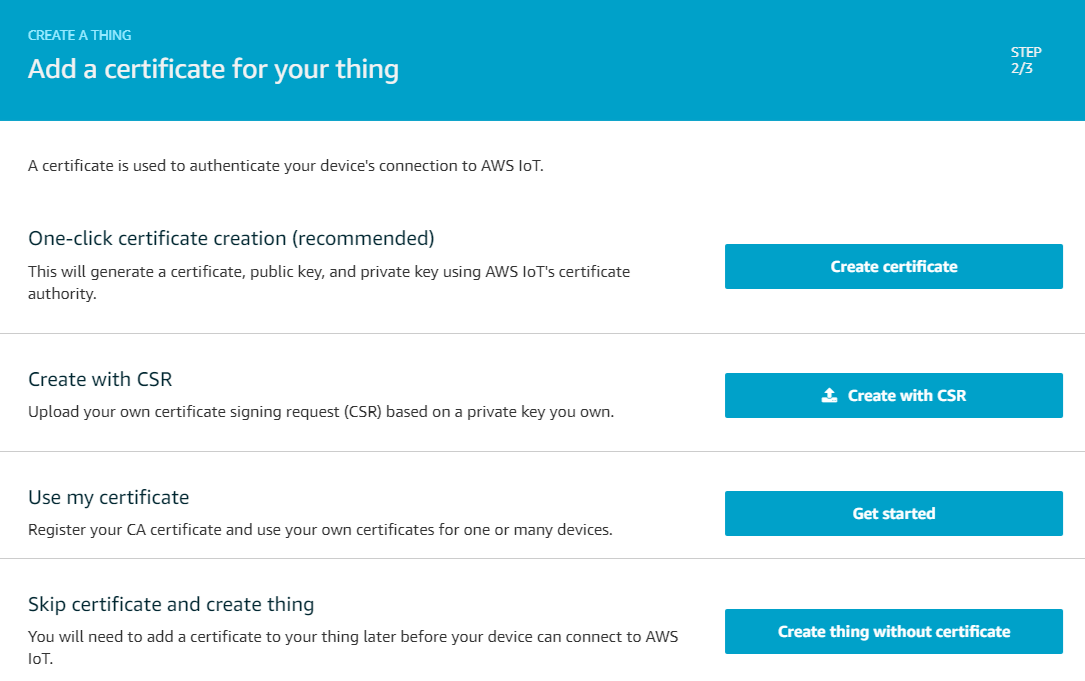
Download Certificate files and key files (4 in total). The root CA cert for AWS IoT file is called AmazonRootCA1.pem on disk. Click Activate to activate the certificate. Click Attach a policy.
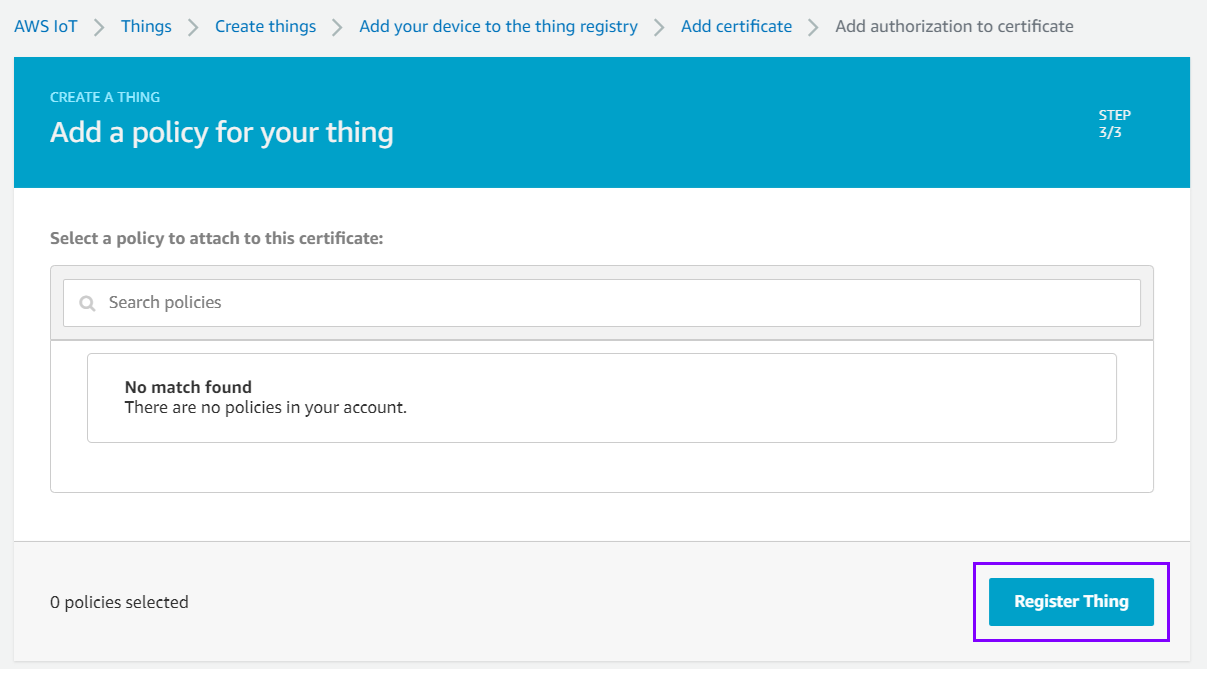
We don’t have any policies to attach just yet, so click Register Thing at this point.
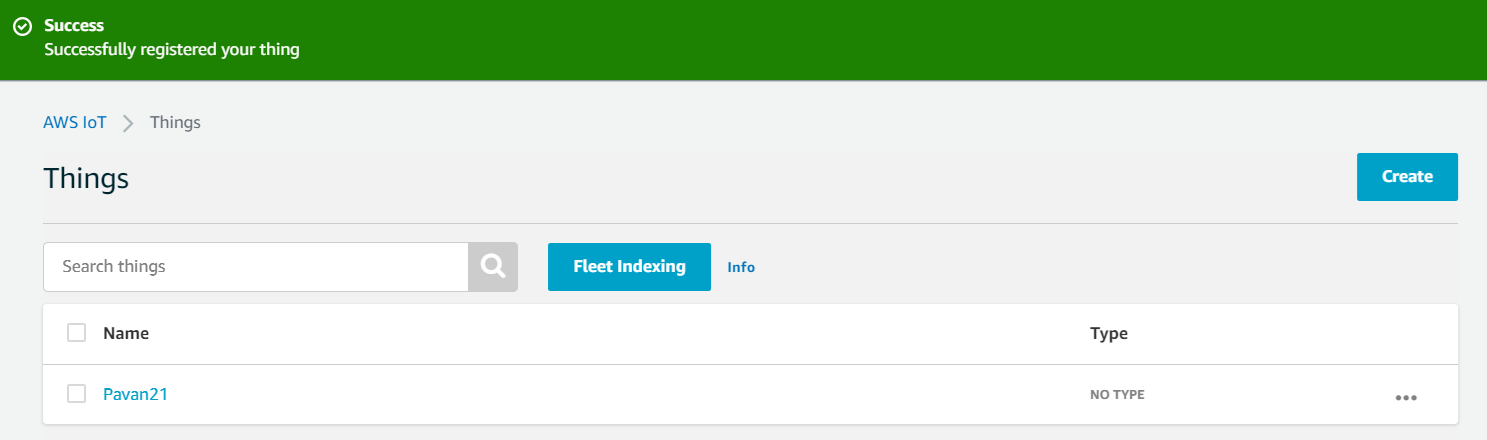
THING is registered successfully💥.
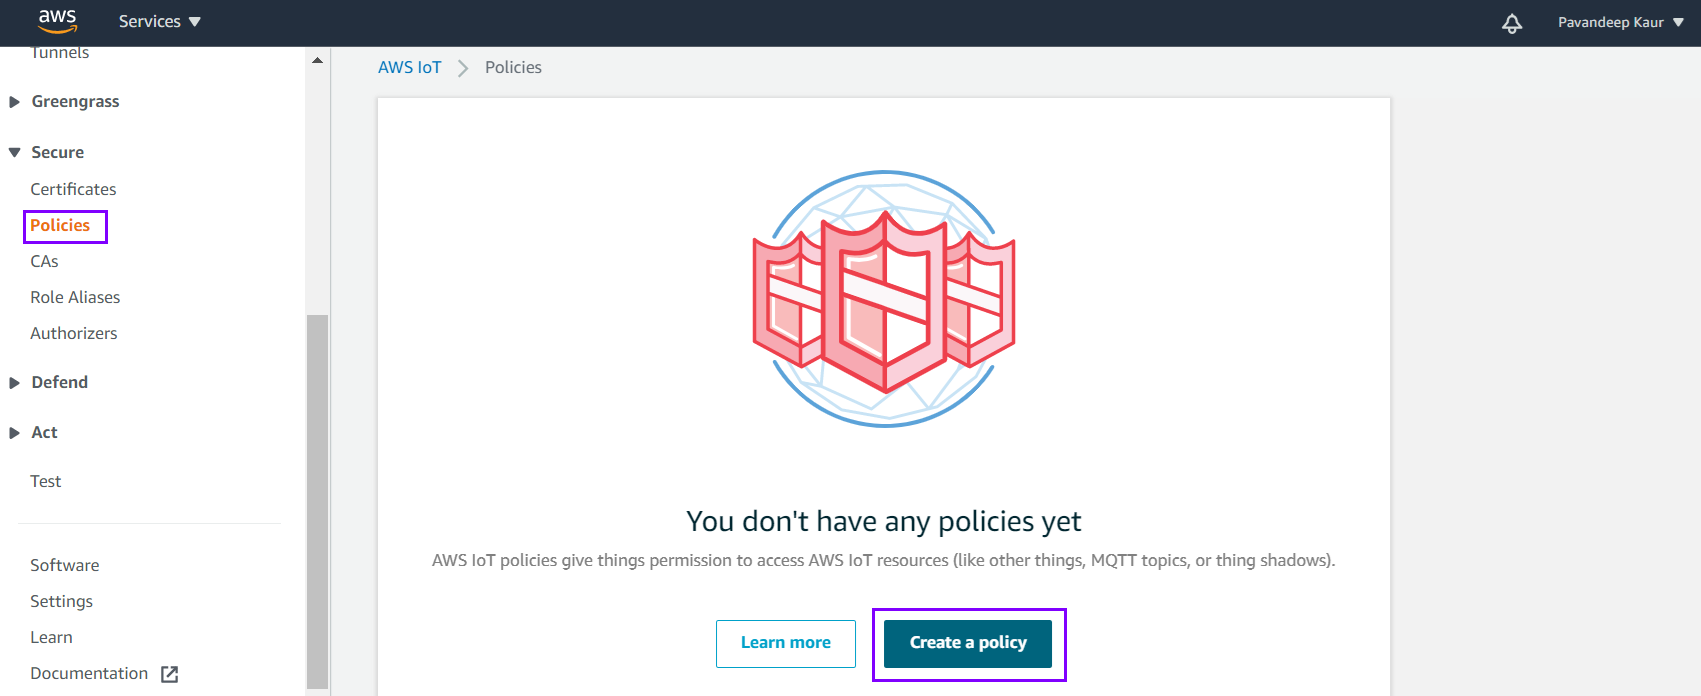
🔗Creating Policy
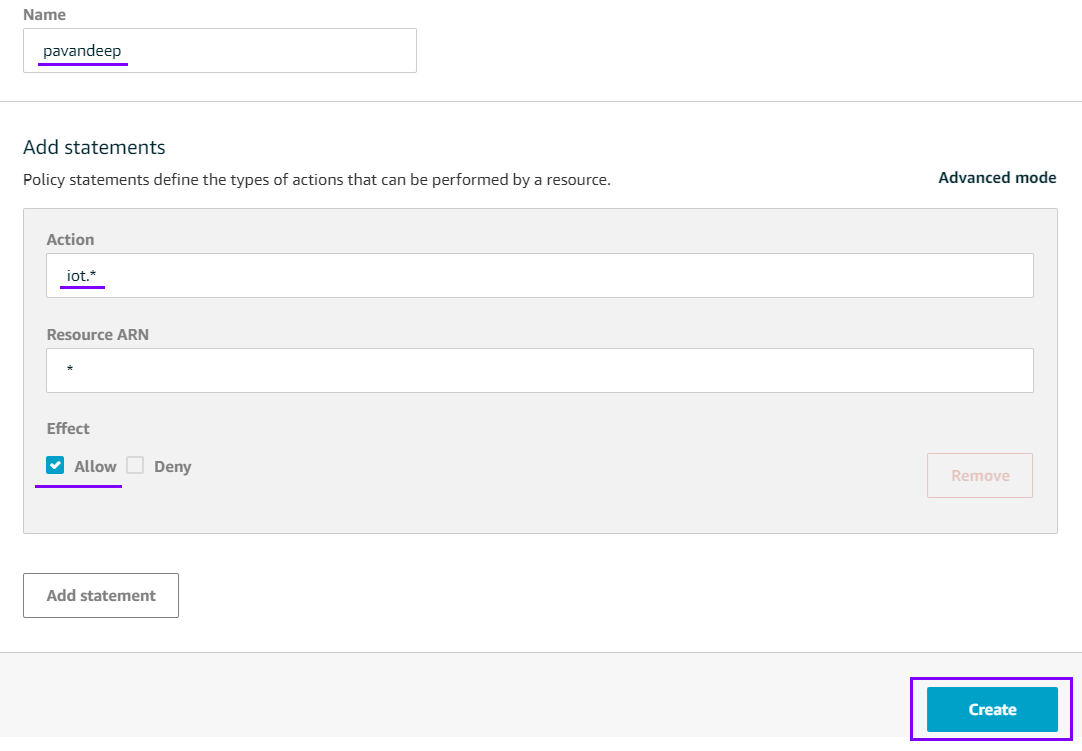
Navigate to Secure → Policies and then click Create a policy.
Fill in the required credentials in the form.
Name = pavandeep
Action = iot.*
Resource ARN = “*”
Check Allow and click Create.
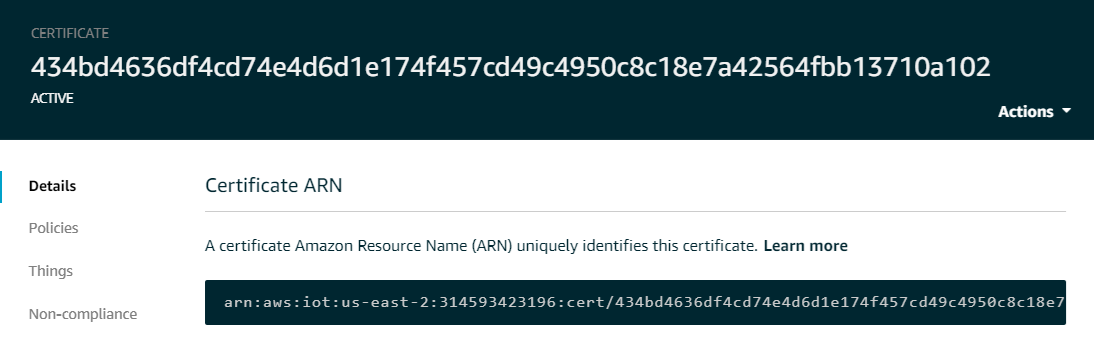
Navigate to Secure → Certificates and click on the certificate you just created
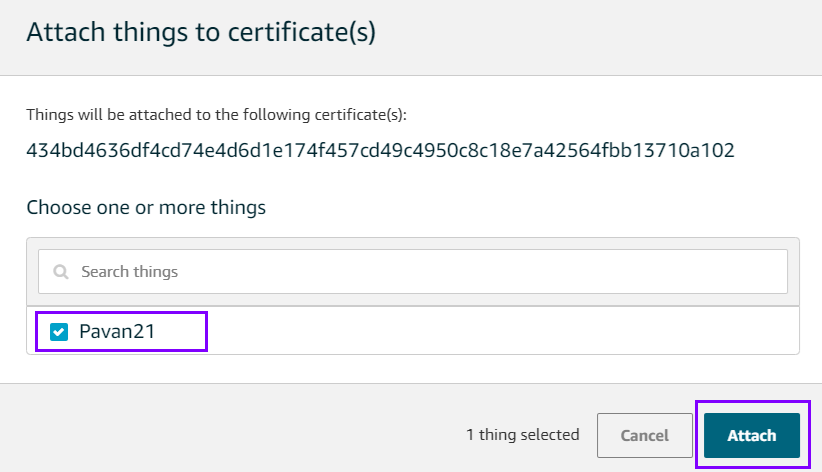
Now attach Thing to the certificate.
Navigate to Details and take note of its Amazon Resource Name (ARN).
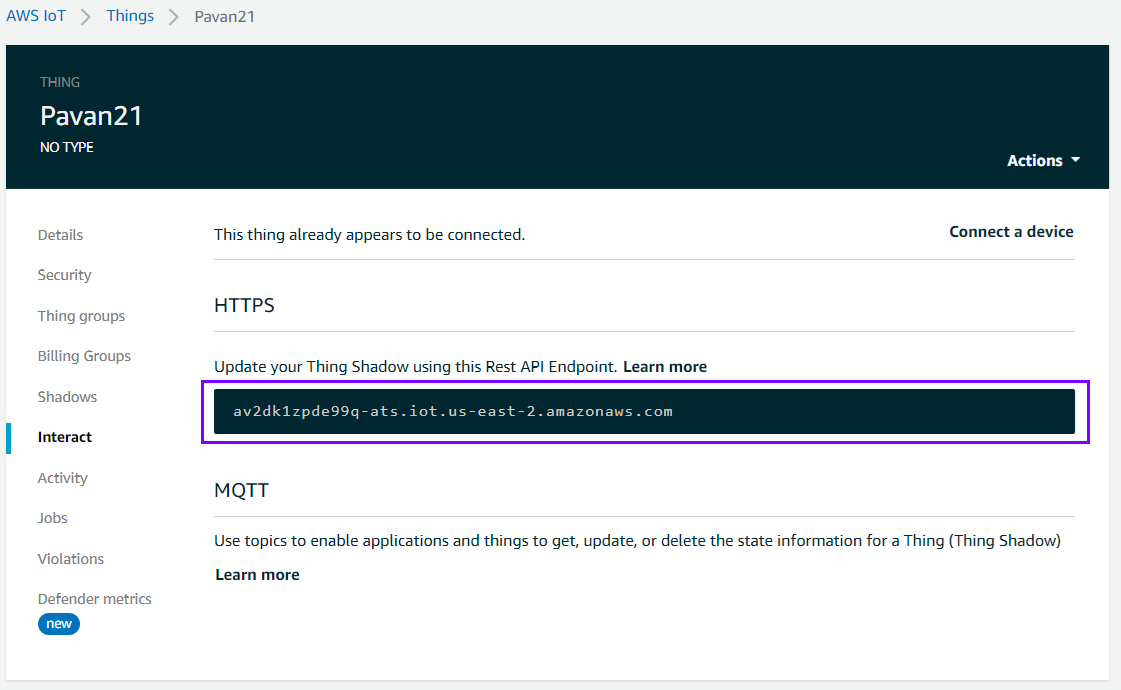
Navigate to Interact and take note of its Rest API Endpoint that is to be used as Server Name.
Now we have performed all actions and gathered all information we need to connect to the AWS IoT. Verify functionality by running the MQTT_BasicExample.vi installed with the WF WireQueue-MQTT vipm-packet.
🔗 Fill in the following parameters in the front panel of Labview:-
• Configuration = Manual Configuration
• Server IP = (e.g. av2dk1zpde99q-ats.iot.us-east-2.amazonaws.com)
• Communication type = TCP/IP (TLS)
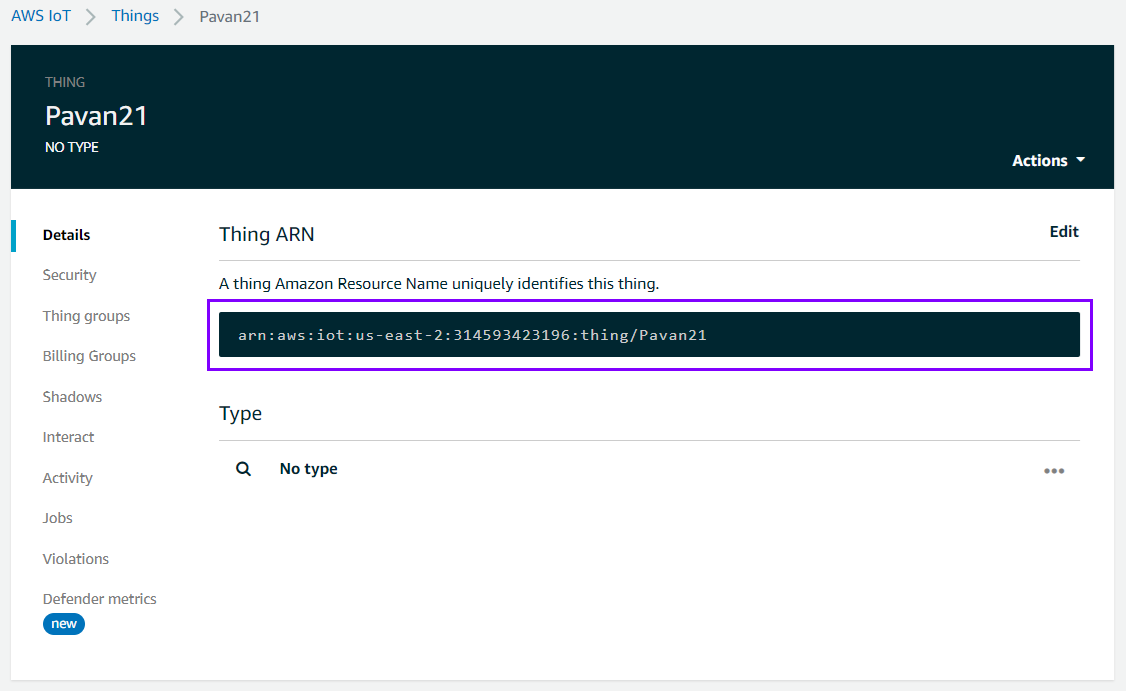
• Client ID = (e.g. arn:aws:iot:us-east-2:314593423196:thing/Pavan21)
That's all. 🙌
Now you are all set to connect your LabVIEW device to AWS IoT cloud using WireQueue MQTT Toolkit.
Thanks for Reading 💖
That concludes this blog article. If you liked it and found it useful, please like and share so that it reaches others as well.


