Fun Coding😍 with ARDUINO UNO for Beginners

Welcome to my world of Internet of Things and Cloud Computing. I received my bachelor's degree in the discipline of Internet of Things. I also write technical articles. I am now pursuing a Masters degree in Cloud Computing. I am an Amazon Web Services Certified Cloud Practitioner.
This blog post is for beginners who want to learn Arduino coding. I recommend to use TinkerCad platform for running these codes as it is a virtual platform where one can make circuits and write codes. It's very interesting platform to learn Arduino coding.
Let's start with very simple codes.
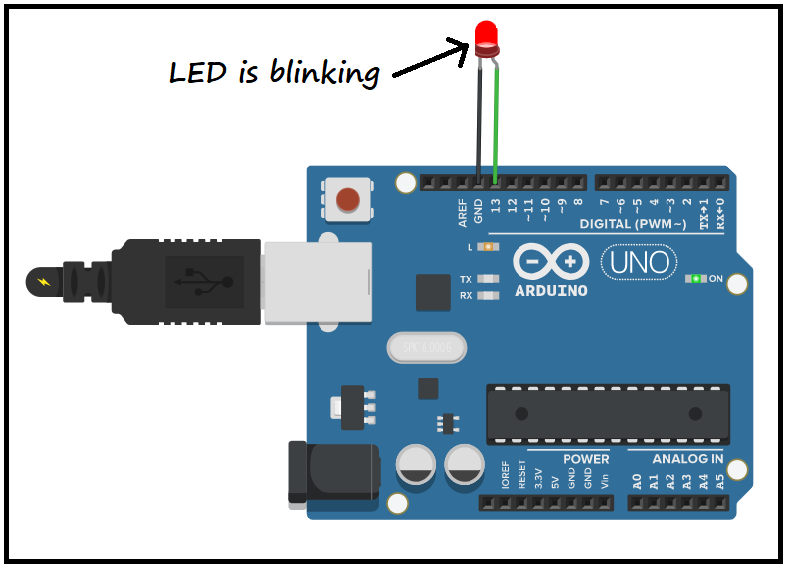
Code 1: To blink an LED using Arduino UNO
- LED has 2 terminals- cathode & anode.
- Connect Cathode (-) terminal to GND pin of Arduino board and anode terminal to any digital pin ( I connected to pin 13)

void setup()
{
  pinMode(13, OUTPUT);
}

void loop()
{
  digitalWrite(13, HIGH);
  delay(1000); // Wait for 1000 millisecond(s)
  digitalWrite(13, LOW);
  delay(1000); // Wait for 1000 millisecond(s)
}
Run the code after connecting LED to Arduino. LED will start blinking after delay of 1 sec.
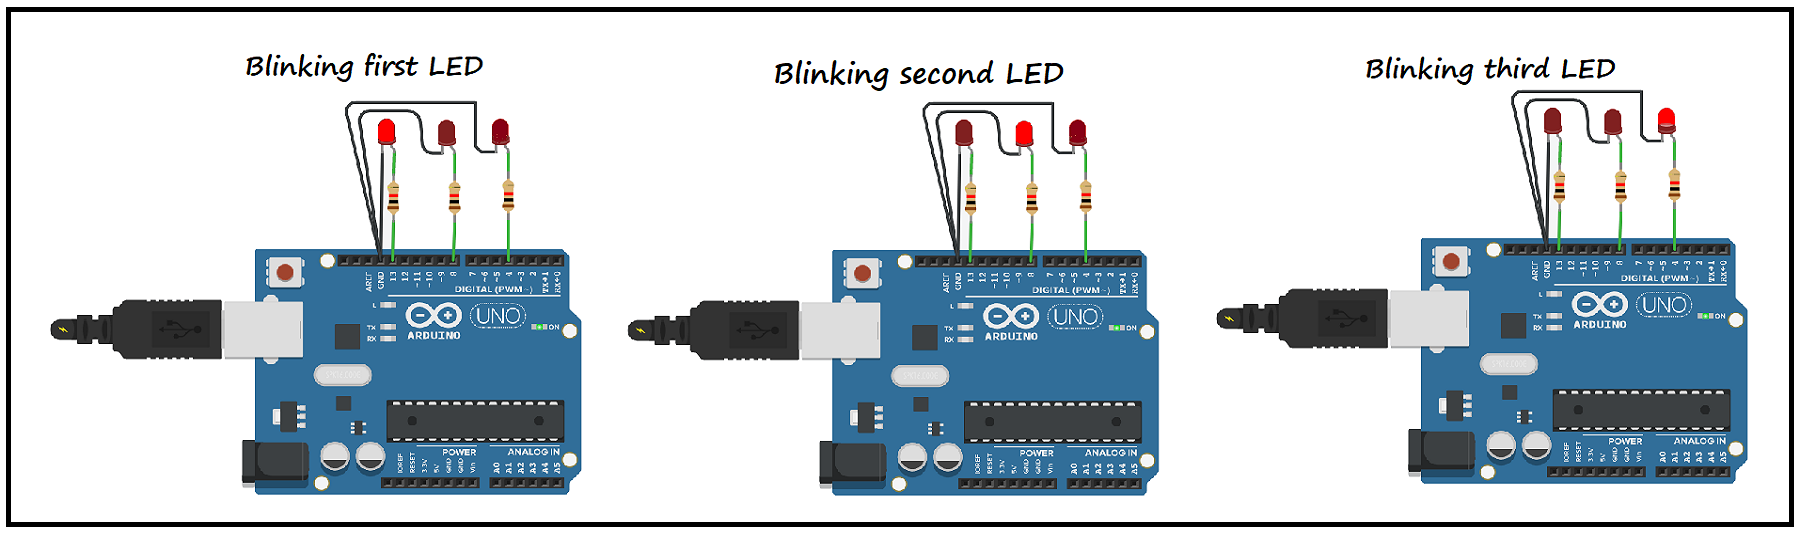
Code 2: Blink multiple LEDs one by one
Connect positive terminals of LEDs to digital pins of your choice via resistors. Connect all the negative terminals to GND pin.
void setup()
{
  pinMode(13, OUTPUT);
  pinMode(8, OUTPUT);
  pinMode(4, OUTPUT);
}
void loop()
{
 // the first LED is made to blink one time
  digitalWrite(13, HIGH);
  delay(1000); // delay time in milliseconds
  digitalWrite(13, LOW);
  delay(1000);
  // the second LED will blink two times
  digitalWrite(8, HIGH);
  delay(500); // the duration is 0.5 seconds
  digitalWrite(8, LOW);
  delay(500);
  digitalWrite(8, HIGH);
  delay(500);
  digitalWrite(8, LOW);
  delay(500);
   // the third LED will blink three times
  for( int i = 0; i < 3; i = i +1 )
  {
  digitalWrite(4, HIGH);
  delay(500);
  digitalWrite(4, LOW);
  delay(500);
    // We can adjust the delay time accordingly
  }
}
Output will be like this-
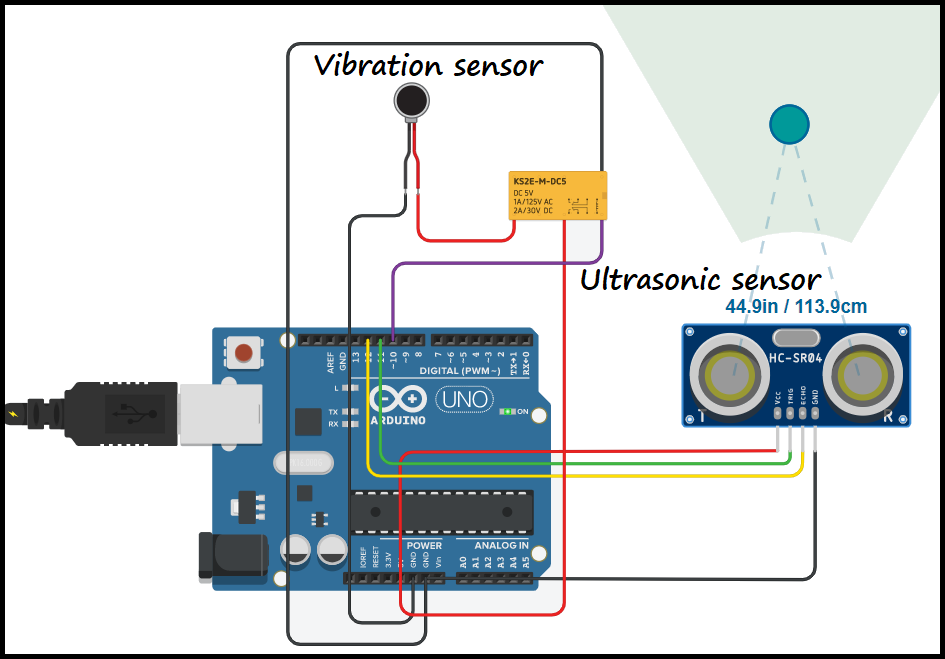
Code 3: Vibration sensor vibrates when any obstacle is coming near Ultrasonic sensor
- Vibration sensor has two terminals - positive and negative
- Ultrasonic sensor has 4 pins -VCC, trig, Echo, GND.
- It will work when the distance is less than 100 cm / 1 meter.
- Connect the modules as shown in following circuit diagram.
const int UltrasonicTrig1 = 11;
const int UltrasonicEcho1 = 12;
const int Indicator = 10;

void setup() {
  Serial.begin(9600);
  pinMode(UltrasonicTrig1, OUTPUT);
  pinMode(UltrasonicEcho1, INPUT);
  pinMode(Indicator, OUTPUT);
}
long duration1;
long cm1;

void loop()
{
  digitalWrite(UltrasonicTrig1, LOW);
  digitalWrite(UltrasonicTrig1, HIGH);
  delayMicroseconds(10);

  digitalWrite(UltrasonicTrig1, LOW);
  duration1 = pulseIn(UltrasonicEcho1, HIGH);
  cm1 = microsecondsKeCenti(duration1);
  Serial.print("Sensor 1 : ");
  Serial.print(cm1);
  Serial.print(" cm");
  Serial.print(" || ");
 // if the distance less than 100 cm / 1 meter
  if (cm1 <= 100)
  {
    digitalWrite(Indicator, HIGH);
    }
  else
    {
    digitalWrite(Indicator, LOW);
    Serial.print(" Save");
    }
  Serial.println(" || ");
  delay(100);
}
long microsecondsKeCenti(long microseconds)
{
  return microseconds / 29 / 2;
}
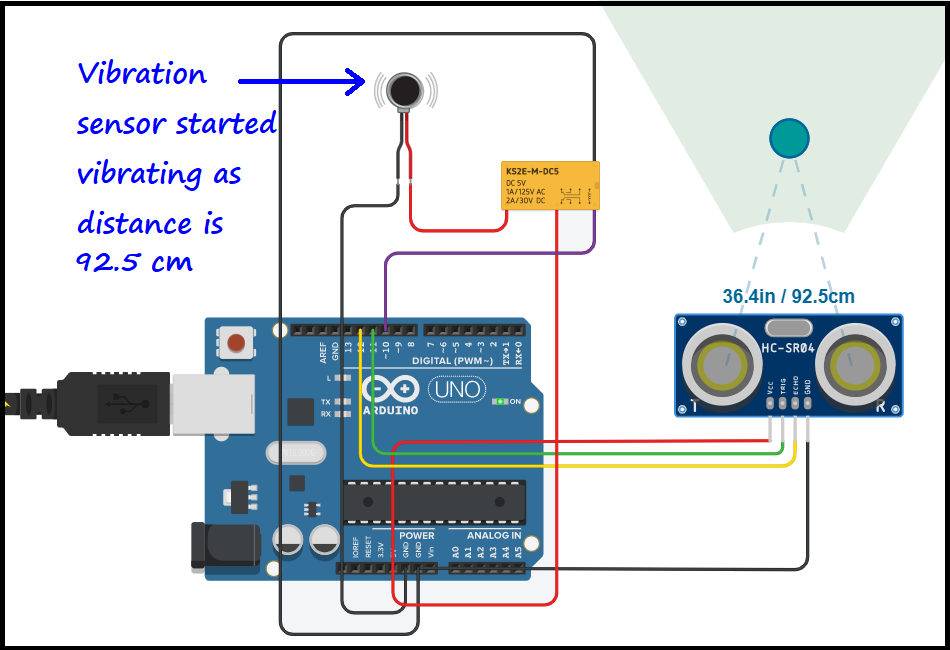
When distance is less than 100 cm, vibration sensor will start vibrating.
Happy coding! Fun coding😊💯


